Posted by : Unknown
Friday, 12 December 2014
To edit tall of the footage that i filmed, i used adobe premiere pro.
Below is screen shots taking you through the process in which i went to achieve my end result.
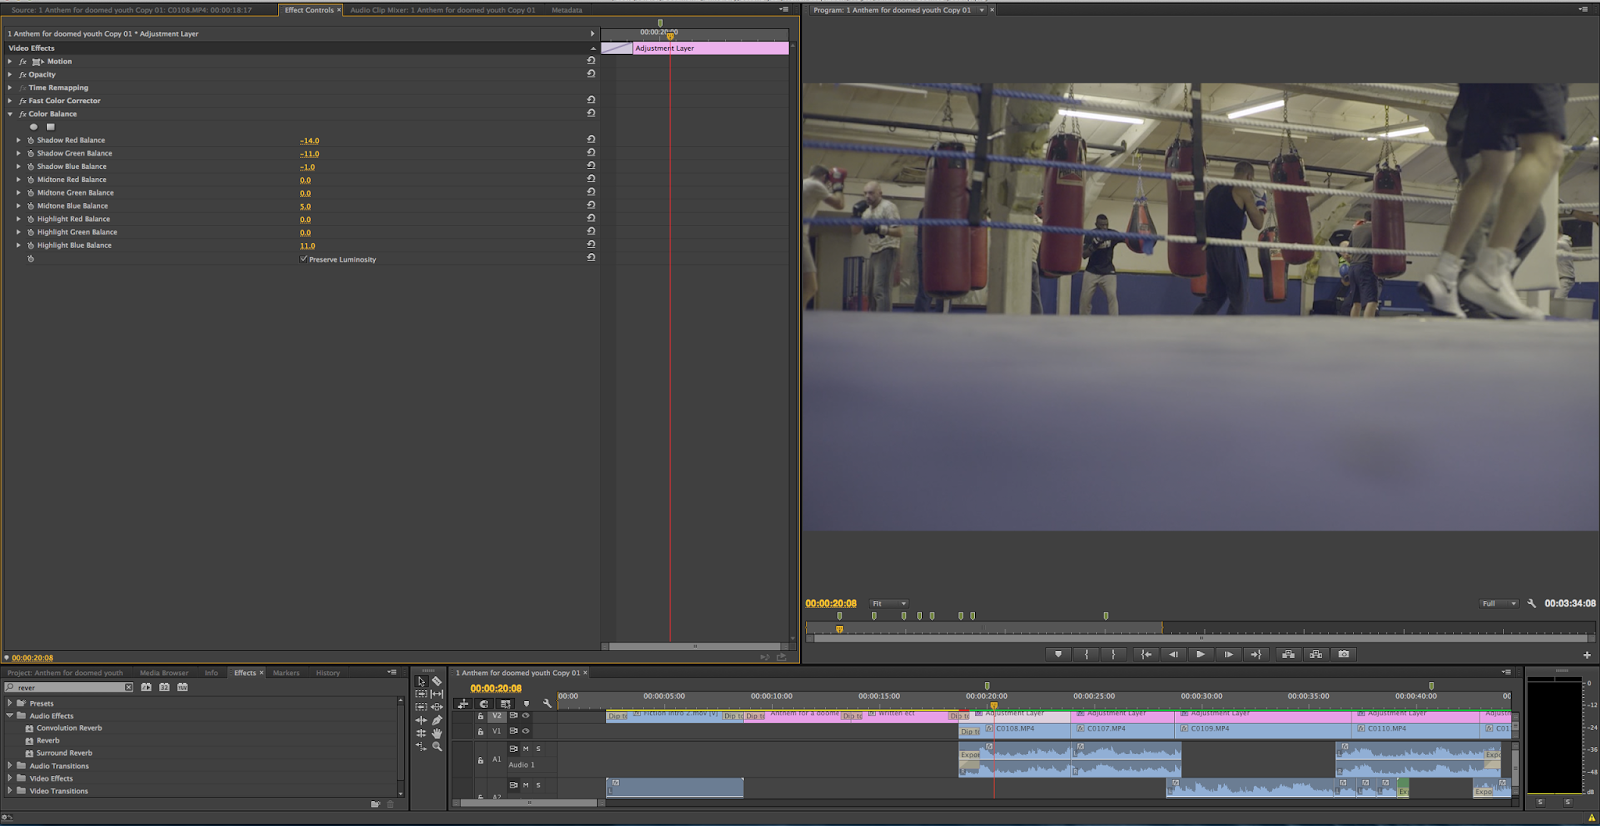 |
| where i filmed in a flat colour profile i went through all of the clips balancing out the colour, making sure that each scene matched the same overall colour tone |
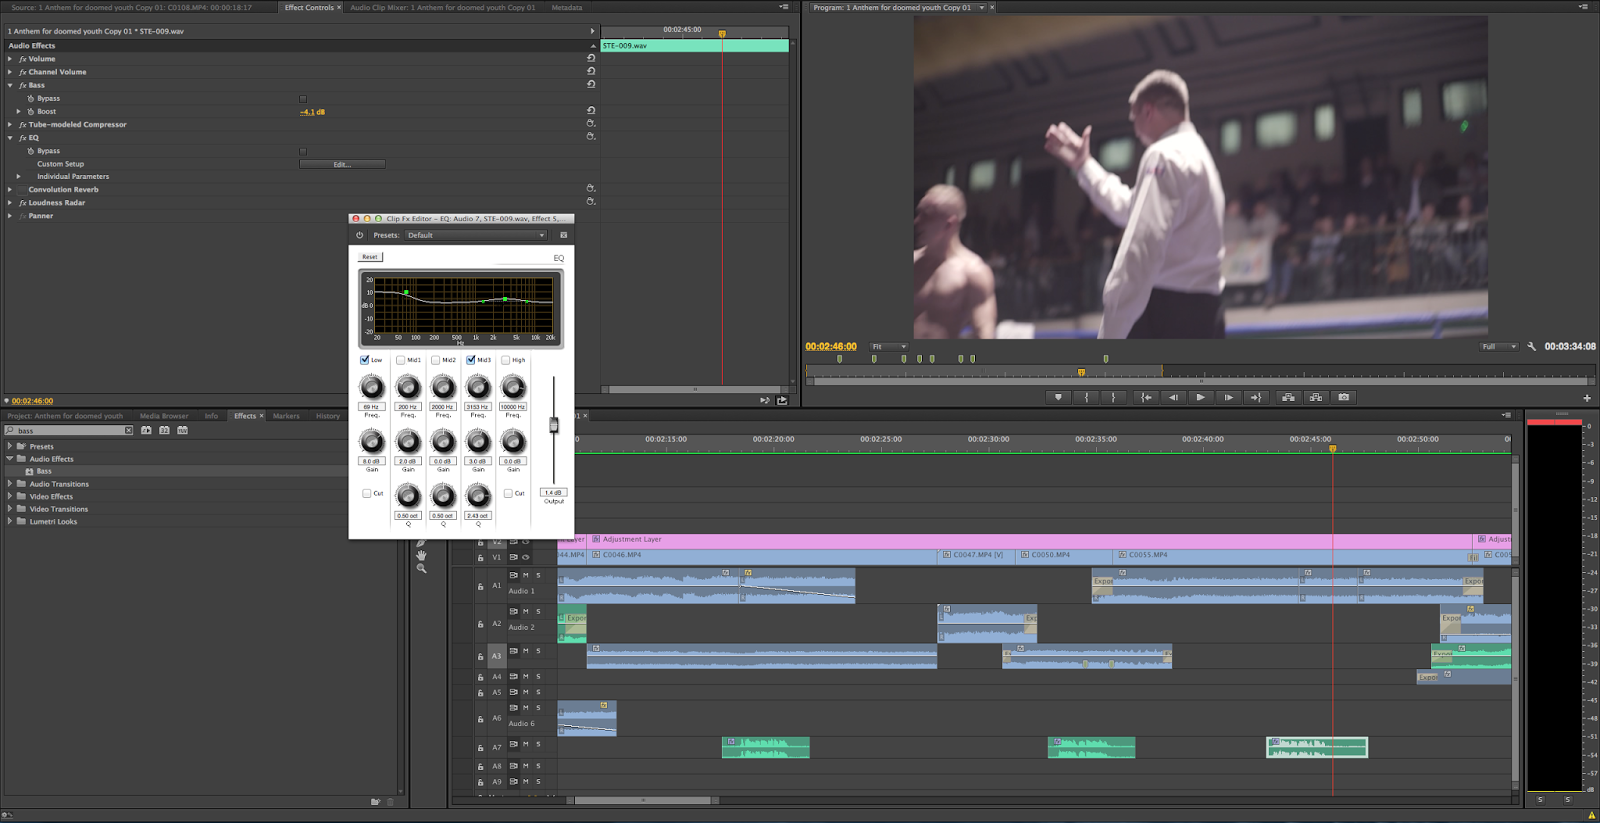 |
All of my audio i eq'd it also inside of premiere pro making use of the sound tools they have available
I used the eq to level out my audio, raising the high end (treble) and also boosting my low end eq's slightly (bass)
|
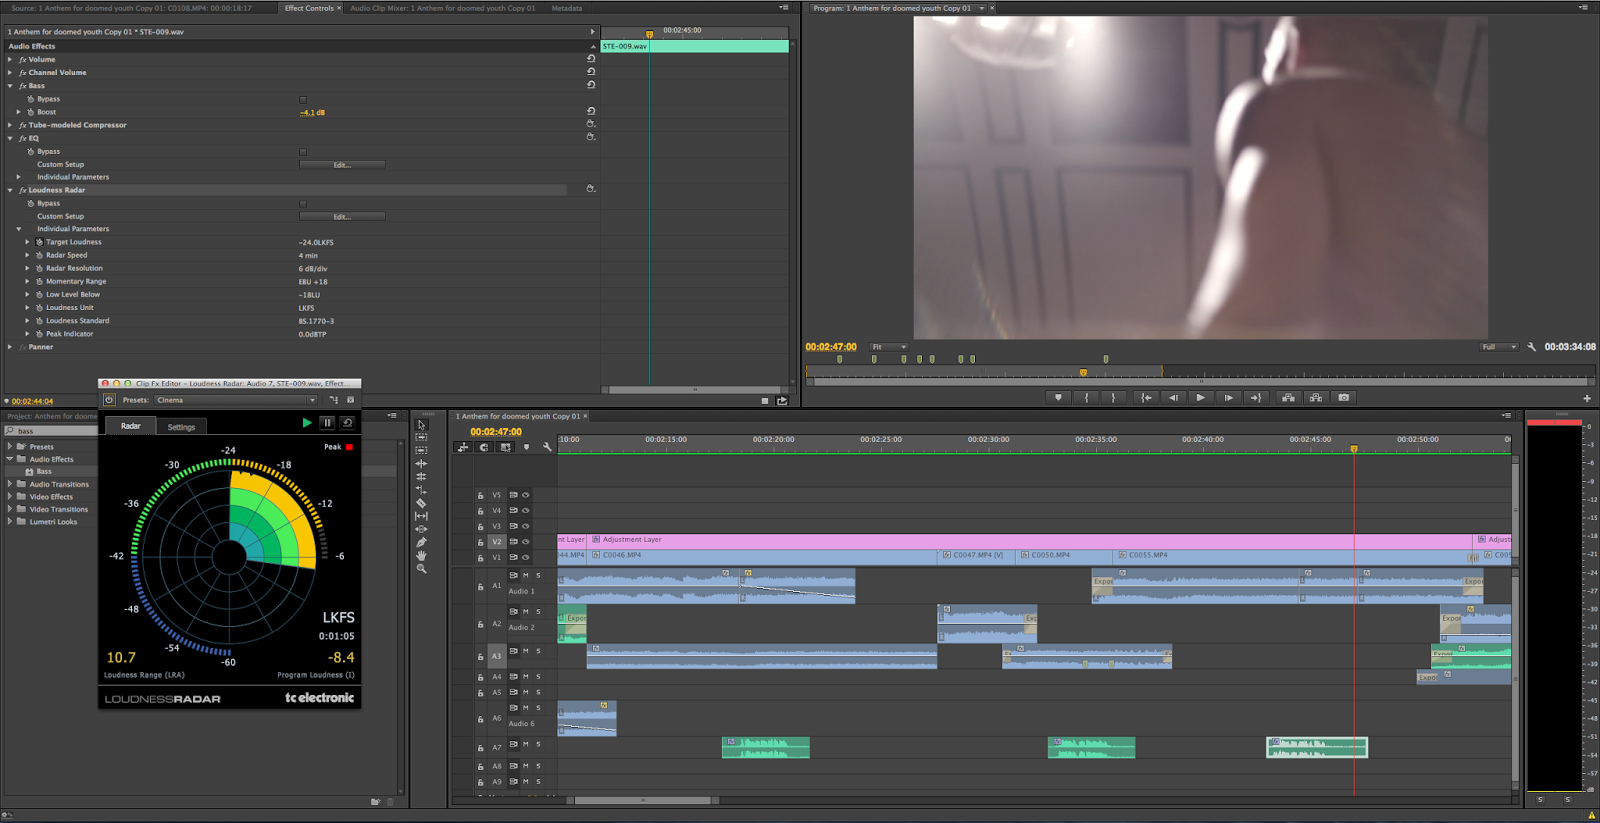 |
| To make sure that my VO was not peaking, i used the loudness radar which gave me readings to let me know if the audio was too lour or too quite |
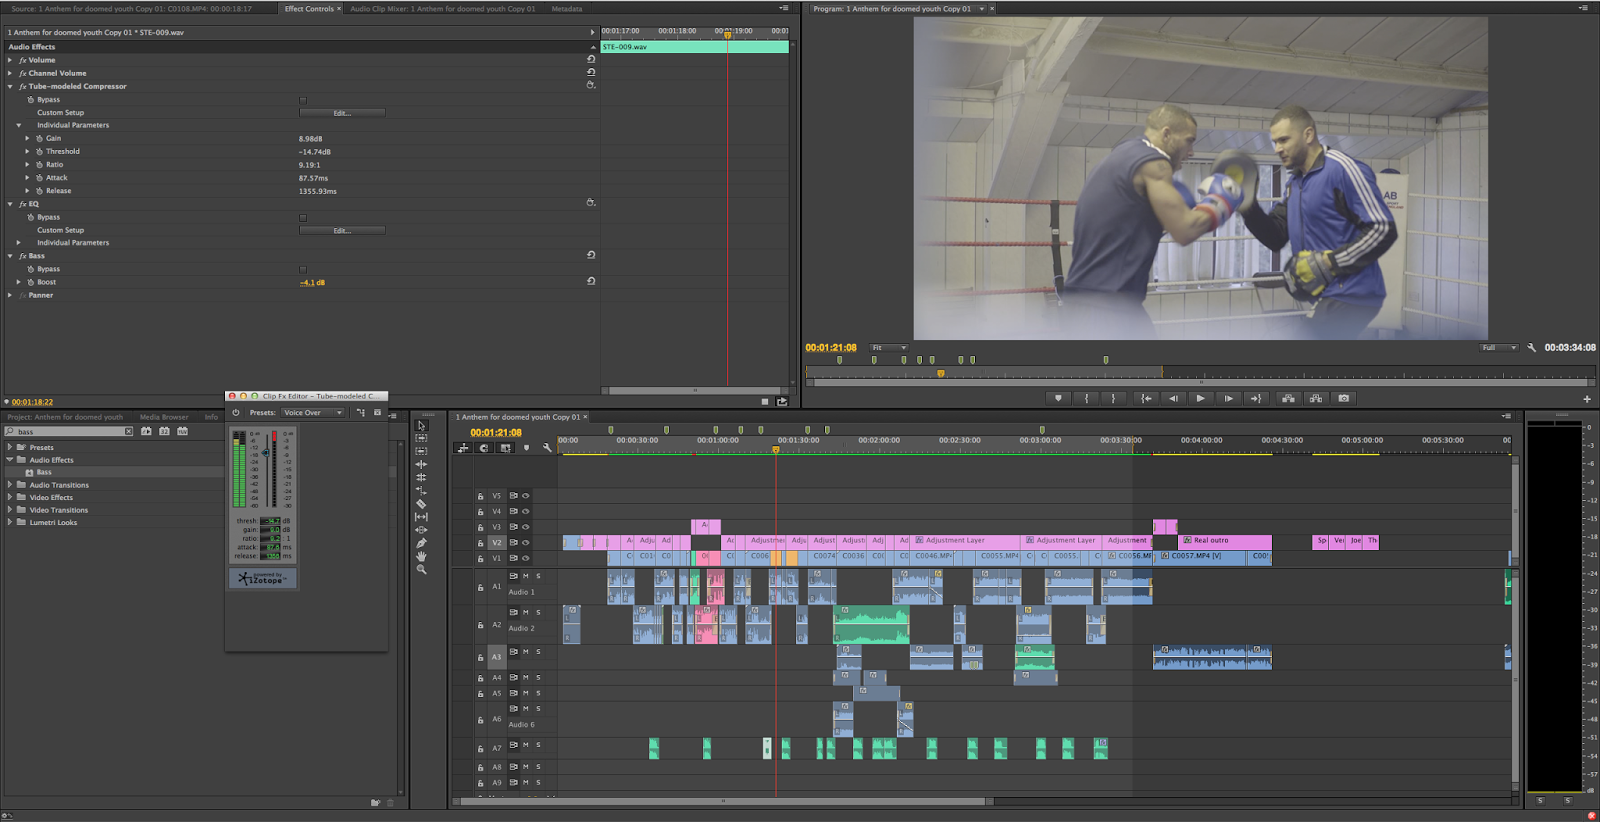 |
| i used the compressor to compress my Vo to make sure that it didn't reach past a certain level, making it clip and distort |
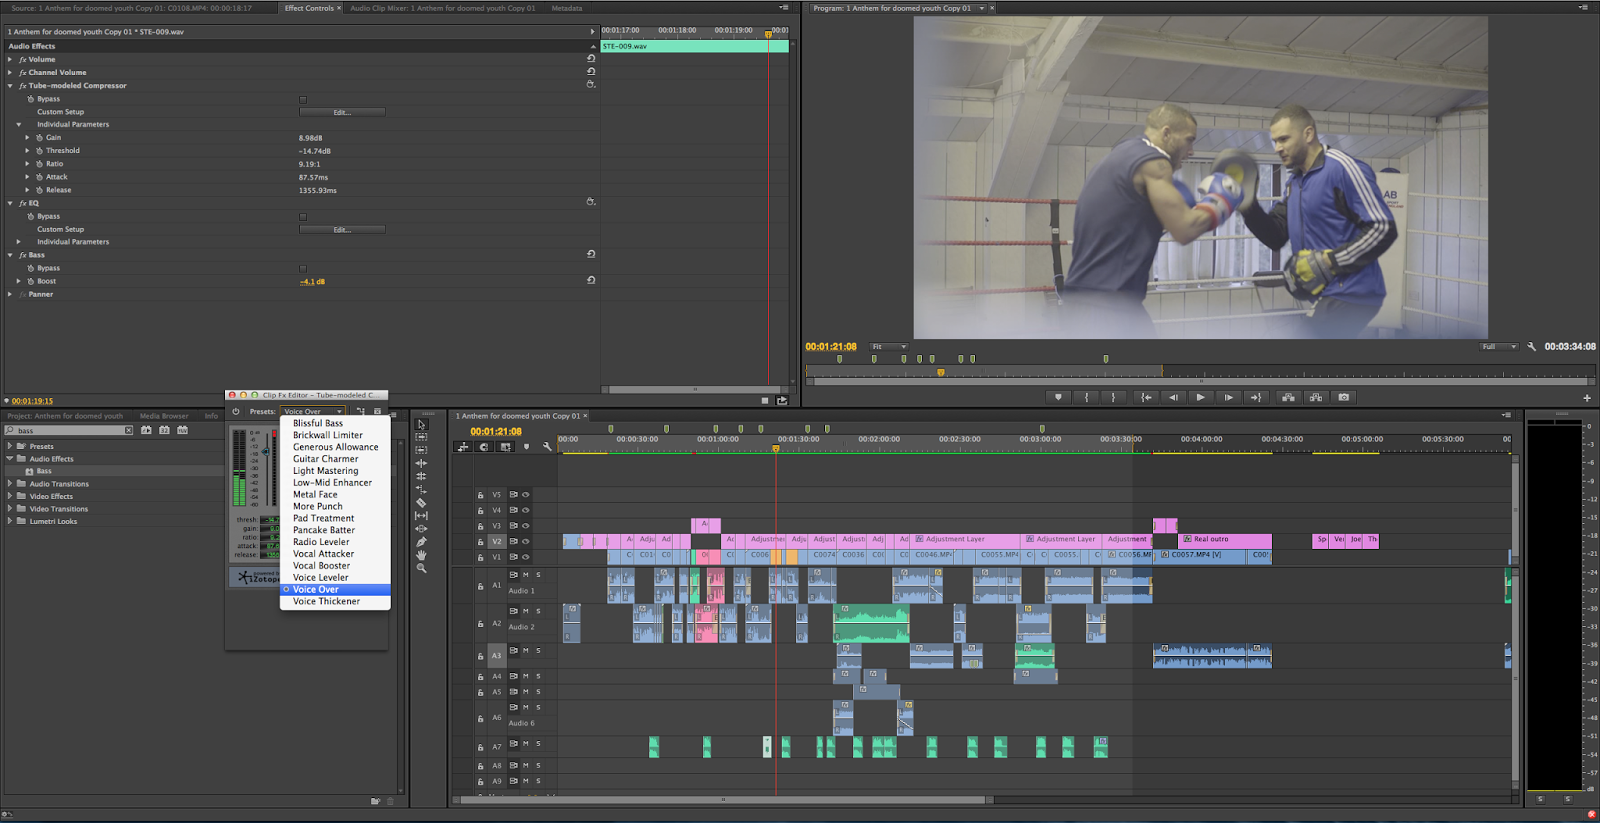 |
| The preset that i used was the Vocal preset |
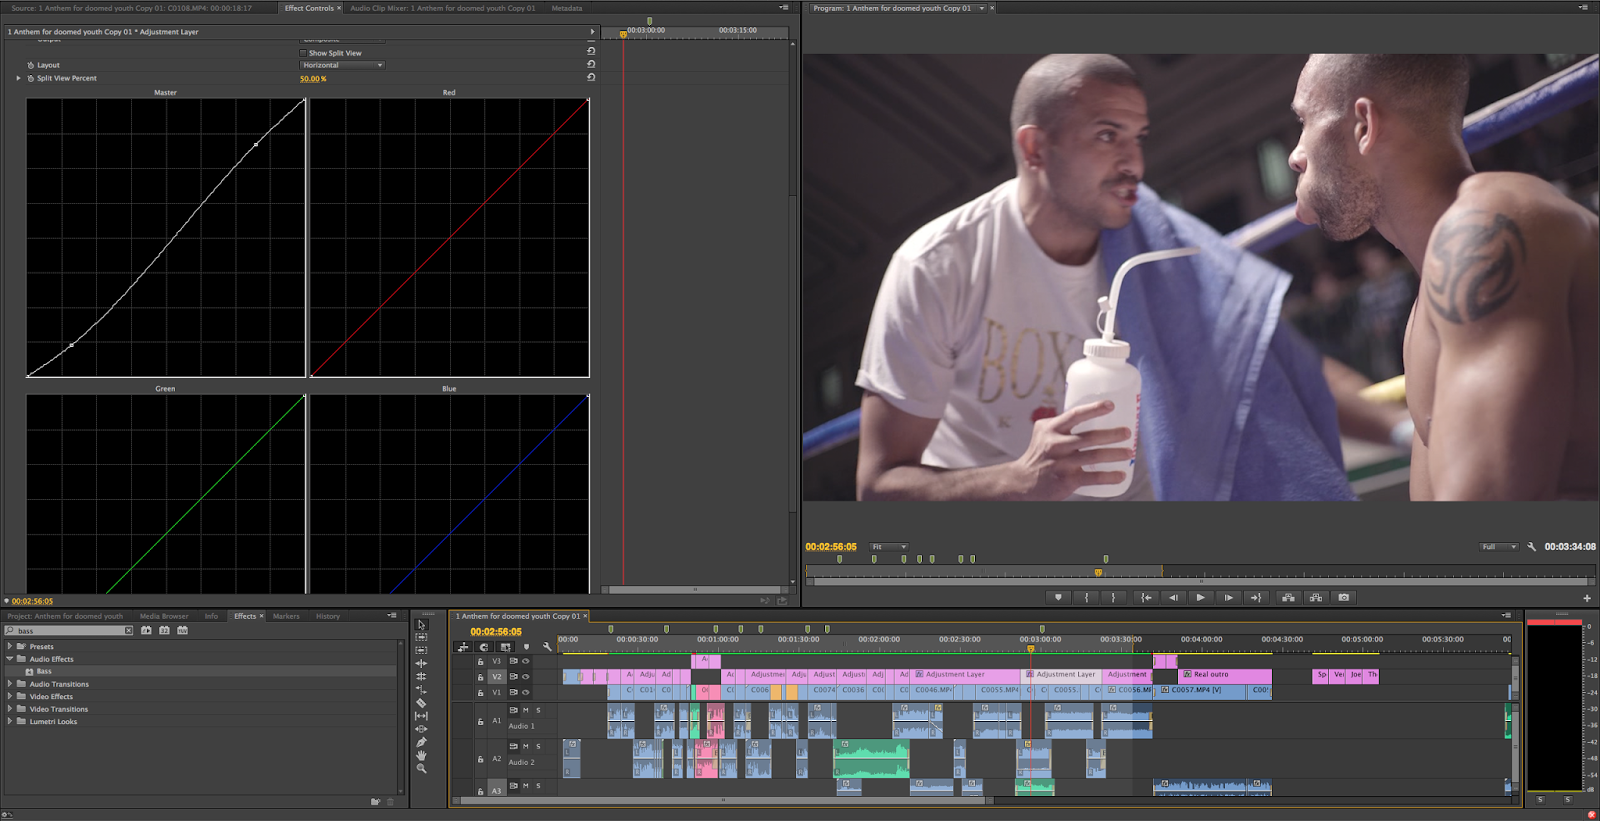 |
| On certain shots i used the RGB curves, to cruse the blacks slightly, increasing the contrast within the scene |
Inorder to achieve this transition i used after effects, i copied the clip from premier pro, and copied it straight into after effects
Using the pen tool i created a mask around the outside of the boxing bag
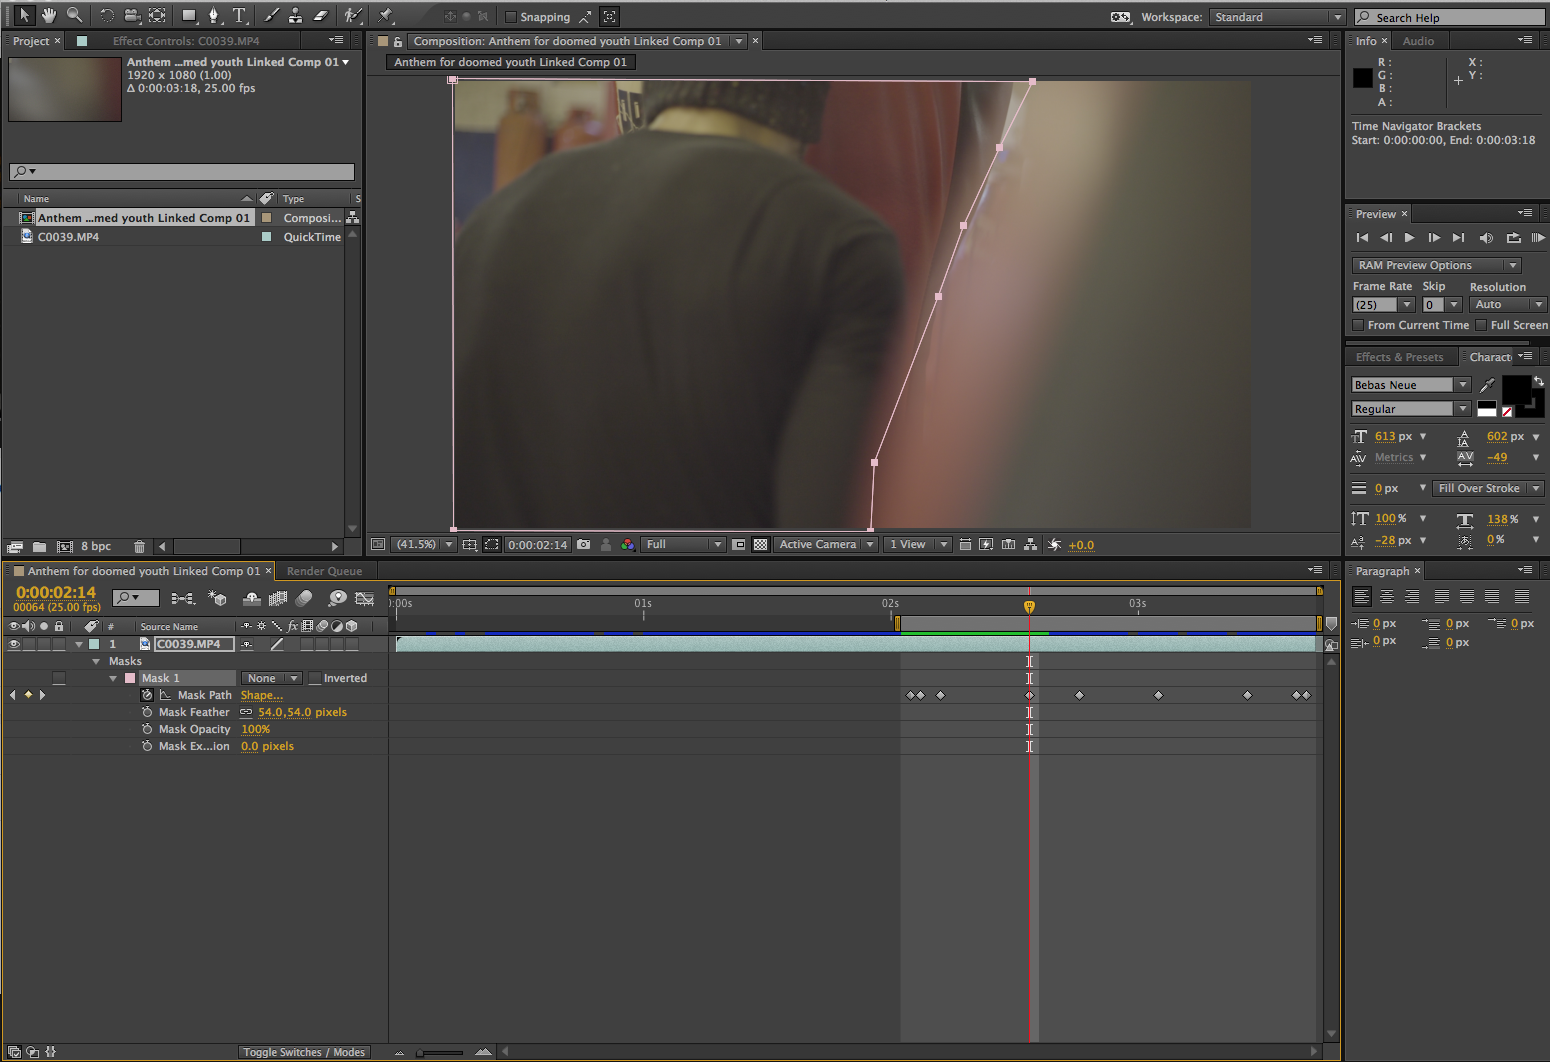 |
| I then used switched on time vary option for that layer, and manually position my mask where i wanted it to be at specific points throughout the timeline |
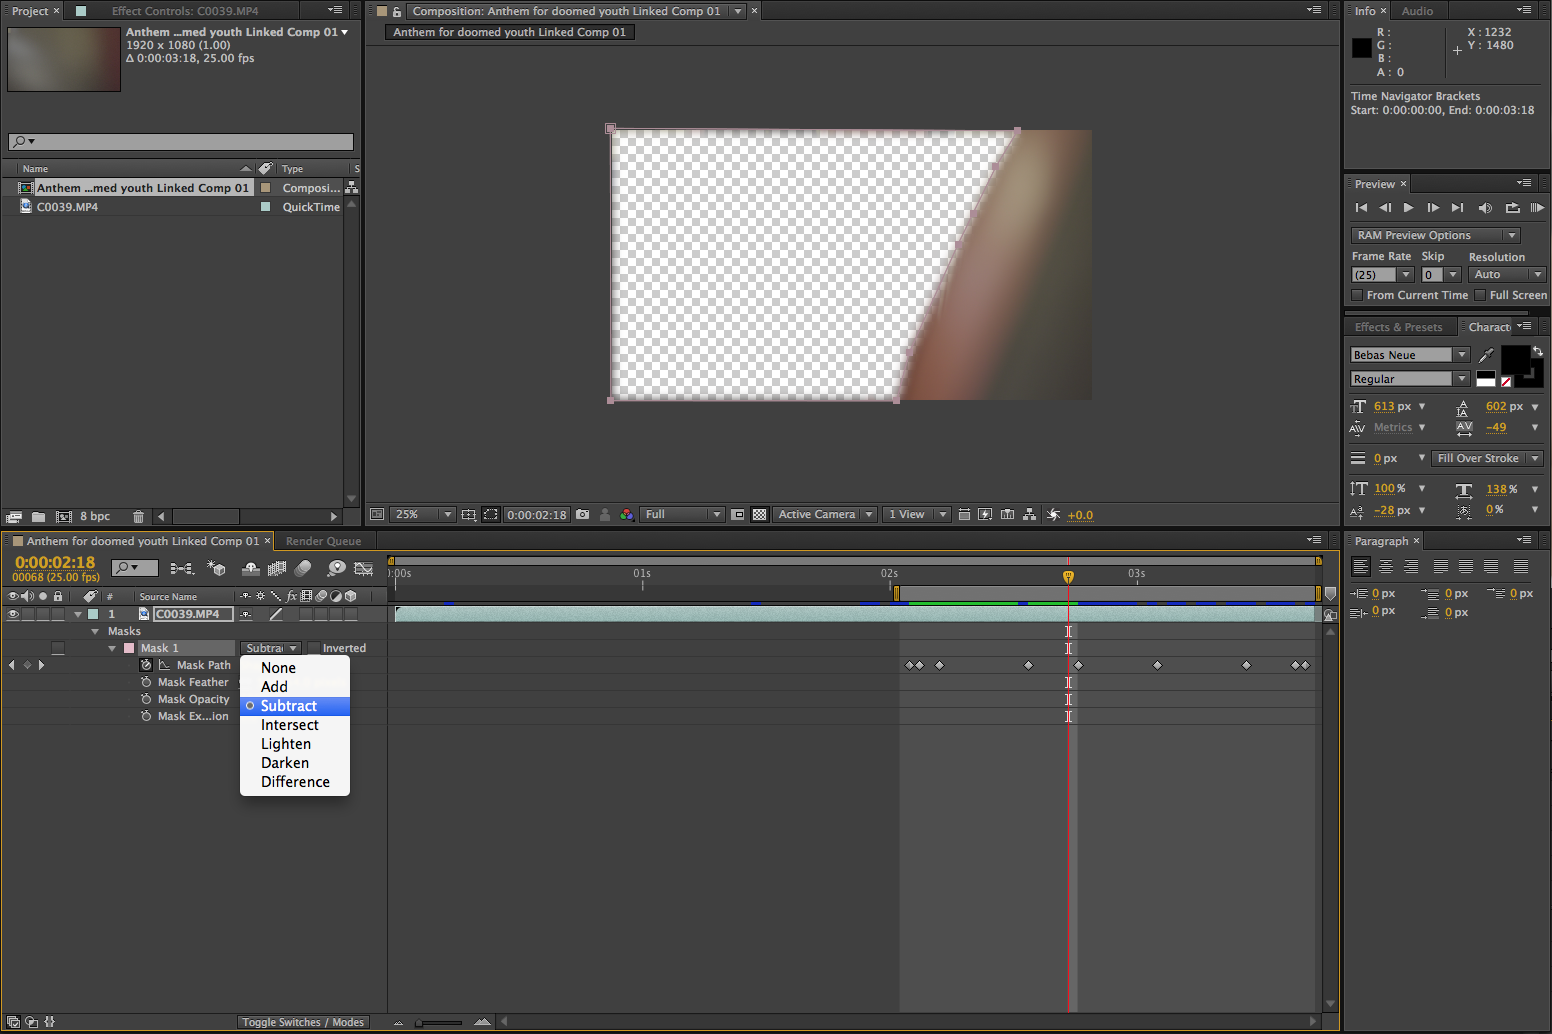 |
| One i had done that, i then clicked on subtract under the masks layers option so that it removed the footage that i did not want, only leaving the punching bag |
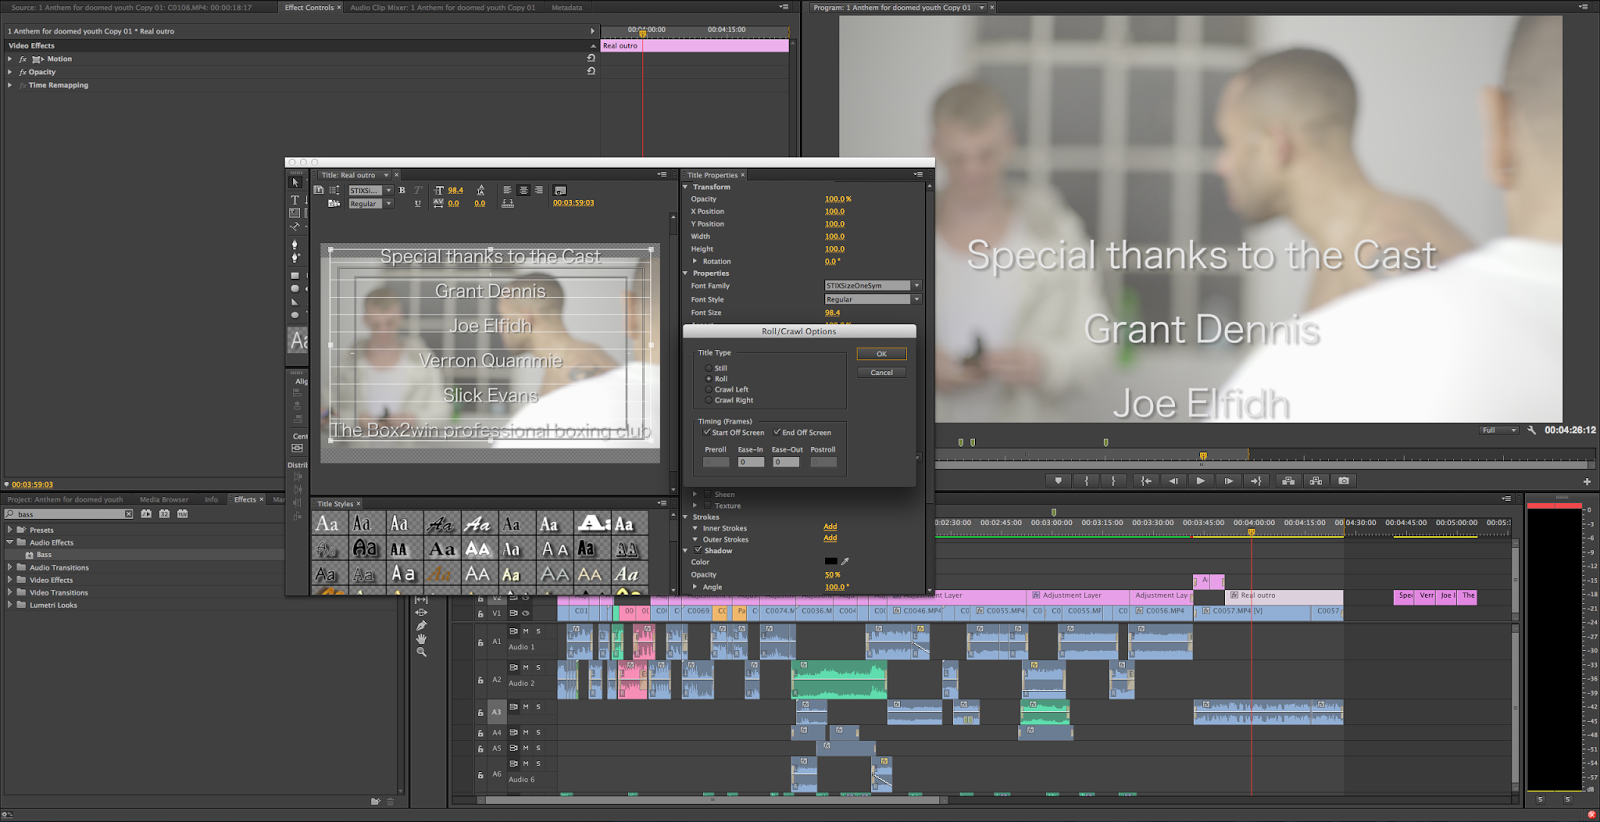 |
| For my credits i used adobes title tool, using the roll crall option to making the rolling credits |


