
Archive for November 2013


After
weeks of planning and preparing, here is the completed project
THE MEETING

Overall thoughts and self feedback on my project
So yea overall i feel that the Story-telling unit was a good learning
experience. I’ve learned a lot from having to create my project; especially since I’ve not done such a production before which require such
things like creating a story, creating your characters and their personalities,
writing a script for the story, set design to convey the ideology of the story
and so forth. Having made a few minor mistakes as well, it's good that It happen
at an early stage on my journey so that I can avoid them in the future. So yea
i definitely feel that the experience gained from this unit will help me to
prepare even more better for the planning of future projects, hopefully
resulting in more time to assure a better outcome.

I decided to create a dvd cover for The Meeting
How i went about doing this was i downloaded a PSD (Photoshop document) dvd template off of a website called http://www.wizbit.net/12cm_dvd_case_artwork_template.htm
When i had done that i opened it up and started to work on the template, first creating my front cover selecting the images i wanted to use, then rotating the canvas and adding on the title, then adding a snippet from the synopsis onto the back cover. Once i had established that, i then began to add on the logos and the phones by searching for their names but including png in the search on google images.
For the phone screens i had to crop out the image's that was on them so that i could then overlay them over an image of my choice. The reason i chosen to have the pictures displayed on the phones was because it follows the theme and idea of The Meeting, where half of the movie is recorded on a mobile phone.
For the cinema typography i used a font called SteelTongs which gave me the dvd type credits that you usually see on dvd covers.
For the title the 'MEETING' i used a font called Buy more.
Here is the final outcome


Scene 1
Tech problem
Because i didn't check the mic before hand and just assumed that all headsets work the same with most smart phones, the mic i was using for phillips recording unfortunately didn't record successfully, it kept on muting while recording, giving me useless audio to work with, and i found out this the hard way when it came to post production.
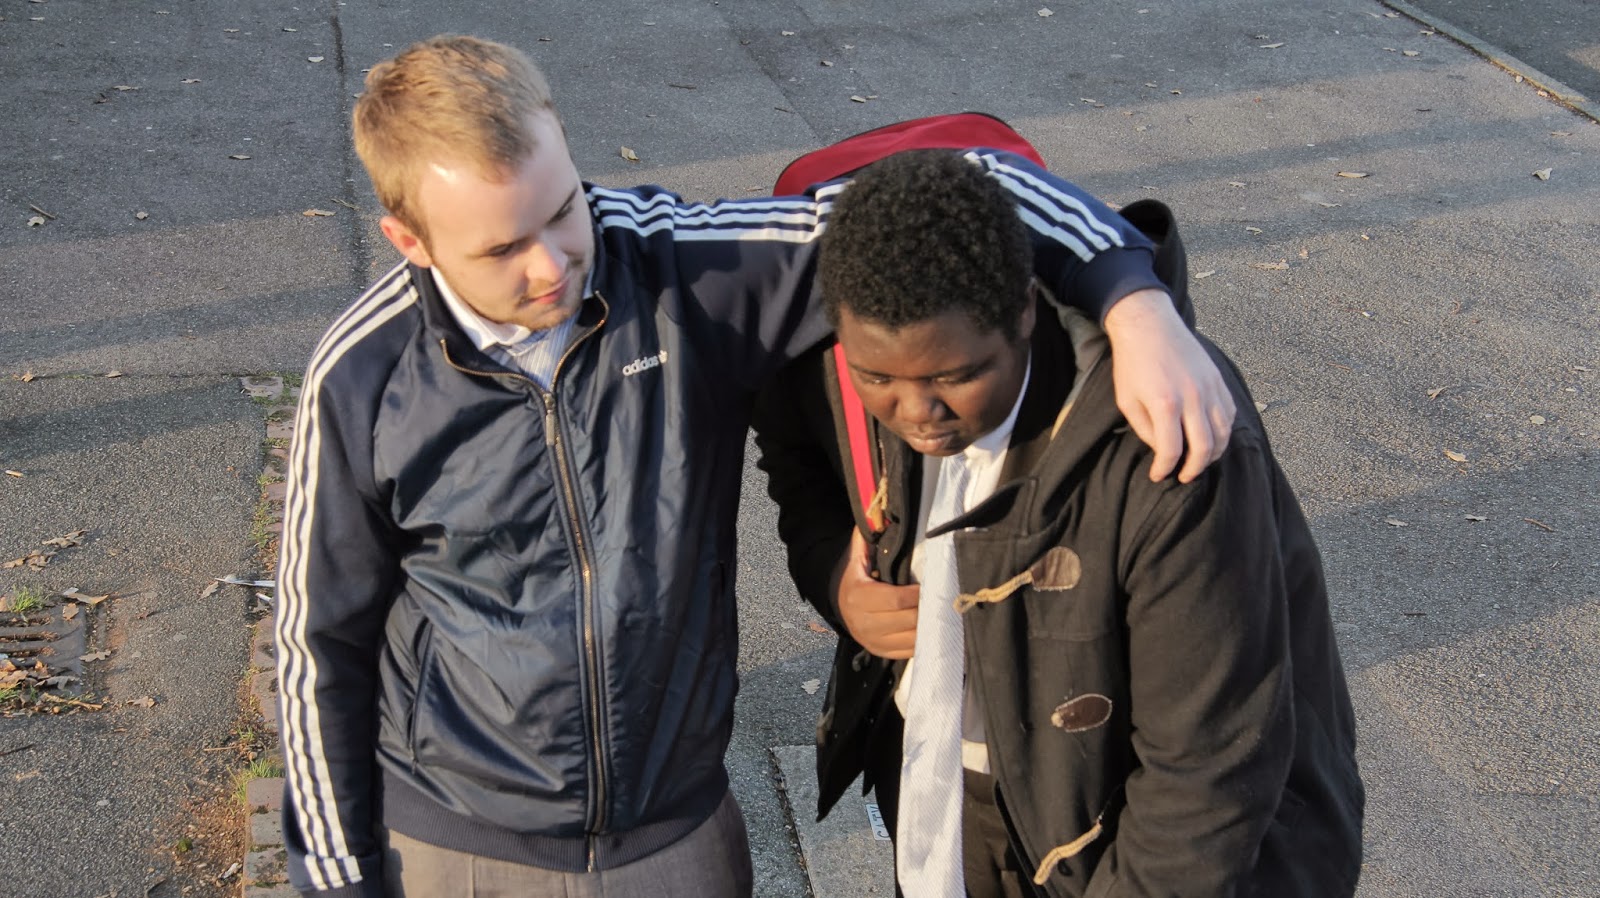
Luckily for me however, because Shaun was so close to Phillip and also the way how i placed the mic on Shauns clothing (having it dangle freely where its headphones so the audience wouldn't take notice) i manage to get a decent recording from Phillip anyways.
For the first scene audio, it was fairly easy to do, i synced Shauns audio and also one of the bullies audio to the footage, once i had done that i lowered the audio using the mixer in adobe premiere where you can control the levels of all of the audio tracks.

Scene 2
shop footage sound
For the shop footage what i'd done was used some of the other scene take sounds to build upon the sound for the second scene, i also used the footage from the 5th take as it was longer, the footage in the second scene on the laptop is really the 5th take but because its a small screen and in the same location it should seem like its a continuation of the previous footage.


Once i had finished compiling the audio together to build the scene. i then played it back through pair of sennheiser hd203 headphones and put my hands free mic from my phone between it and recorded the audio using my phone. I then sent the file from my phone to my laptop and imported it into the project and synced it on the sequence with the laptop footage.
I done this so that to the audience viewing the footage, it would sound like the audio is coming out of the laptop. I could of used the hi pass filter but i would be loosing to much of my lower end frequencies and the audio would sound to unnatural for the scene; also it would be extra unnecessary work.

Bedroom sound
Even tho i recorded additional audio, like the foot step and the door slamming and pen pot slapping, in the end i didn't need to use all of the audio because what my camera mic had picked up was good enough, after the gain being adjusted to make the audio sound louder it was good to use.
For phillips moms voice, whilst recording i did not realise that there were mobile devices close by, and this affected the quality of the sound recording, however i managed to cover this up by lowering the voice of phillips mom and applying a high pass filter to her voice only focusing on the hi pitch of her voice, damping out the signal interference with the bedroom sound and also the laptop.
For phillips moms voice, whilst recording i did not realise that there were mobile devices close by, and this affected the quality of the sound recording, however i managed to cover this up by lowering the voice of phillips mom and applying a high pass filter to her voice only focusing on the hi pitch of her voice, damping out the signal interference with the bedroom sound and also the laptop.
Overall thoughts
The sound editing went fairly well, however if i could re-record some of the audio again i would record phillips moms voice over because of the signal interference.

So now onto the editing stage..... For this post i'm going to try and take you through the stages of me editing so you can understand what it is that i've done and what i'm aiming for.
Sequence settings

First thing i done was to select which takes i thought was the best out of what i'd filmed for the first and second scenes.
Once i had done that i then arranged it into order on the sequence.

I then began to color correct the second scene using the fast color correction tool to get the correct white balance, i also adjusted the black white and grey levels to make the footage slightly
brighter to get the light ambience from the laptop showing more.

Used the three-way
color corrector to adjust the luminance of the colors by lowering the
highlights and slightly increasing shadow threshold on the tonal range definition.
 |
| Used the vectorscope to see if the luminance levels coming from the laptop screens was broadcast safe whilst adjusting the levels |
 |
| before |
 |
| after |
Added a vignette
to focus the attention on the actor and the laptop screen.
Added in curves
and adjusted the mid-tones to slightly increase the rays coming from the laptop and also
 |
| Added a vignette using the Magic Bullet Looks Pluggin |
 | |
|

Added in a 35mm film grain to give the footage more of a filmic look, it also slightly brightened the contrasted shadows in the footage a bit as well.
 |
| 35mm Film grain applied to footage using the overlay blending mode |

For the mobile phone footage, I used auto
contrast, auto color and auto levels to give the mobile that realistic feel as
normally the way how a mobile phone video recorder functions is that its constantly
adjusting the levels whilst filming where you don’t get manual control over the
video recorder settings. I also added in the mosaic effect to make the footage pixilated
where the footage from my phone was to crisp/clean.
 |
| Before effects added |
 |
| Effects added |
Feedback/notes
Overall the look what i designed is what i was aiming for, however, because of the crop sensor on my camera, i was limited to how high i could boost my iso before you started to see a lot of noise, i couldn't use my 50mm f1.8 for the extra light ambience because i didn't have enough space in the room for the angle i wanted to film at, and my subject wouldn't be able to fit in the frame. When it came to post production, my footage was slightly noisy in the more contrasty parts of the composition when adjusting the brightness, there's a third party pluggin i came across that deals with noise called neat video, but unfortunately at this time i wasn't able to use the pluggin, but besides that i'm pleased with my end result.

intro composition

First thing i done was changed the name of the title from 'THE MOVIE' to 'THE MEETING'
I then shortened the composition from 12 seconds to 8 seconds by moving the current time indicator to 8 seconds on the composition timeline and using the keyboard shortcut N to crop the composition work area to that time, and then trimmed the composition to the work area.
I then moved the opacity keyframe to end at 8 seconds and moved the position keyframe so that it would end after 8 seconds keeping the title constantly moving during its visible animation.
Where the lavender bar is on the composition (Twitch layer name), that is an adjustment layer what has a 3rd party pluggin applied to it called Twitch by riot gear, that pluggin has a selection of pre programmed instructions/effects which you can apply to your footage by the click of a button.
The effects this template is using is Slide ( separates the rgb colours from a media source) and light (randomly lights up media source)
 |
| Text without the effects from Twitch |
 |
| Text being affected by Twitch's slide and light effect |
What i done with this pluggin was unselected the slide effect and kept the light effect on, then i duplicated the Twitch adjustment layer and moved the copy of it towards the start of the time line, so that as my title graduallly appears it is affected by the light effect from the pluggin, and then affected again later on down the time line before it fades out.
Here is the final intro title i ended up with

For the outro it has pretty much the same set up as the title, only thing extra it has got is that it has text animation applied to it through the text animator opacity, and the opacity is affected by the range selected which is key-framed to time when each character appears on the screen, one after another.
Outro composition

What i done with this outro was i extended it to 10 seconds and changed the 'coming' to release date and the number date to ' T.B.A', i also added in the title from the intro above it i also included other elements from the template and amended it so that it reads my name and also my blog page and the story telling unit, fading out towards the end.
Here is the final result
 |
| Before amendments |
 |
| After / final result |
Once i had completed my outro and intro, i then imported them into adobe premier by linking the compositions onto The Meeting project timeline. How i done this was by creating a transparent video, placing it twice onto the timeline, then left clicking and selecting replace with after effects composition.
Here is the final results
Here is the final results


The tools that im going to be using to produce this project is, my 2011 Macbook pro running at 2.3GHz with a core i5 processor and 16gb of ram. Adobe Premiere Pro, Adobe After effect and Adobe Photoshop cs6.
To edit my production i'm going to be using Adobe Premier Pro cs6, together with a 3rd party pluggin called Magic Bullet Looks for the colour grading.
Im going to create my titles on Adobe After effects and might use a 3rd party pluggin called Twitch and Knoll light factory.
All my artwork is going to be done on Adobe Photoshop cs6, and i might also use a 3rd party pluggin called Magic Bullet Photo looks for the colour grading.
To process the audio i'm in two minds whether to use Logic or adobe audition, if i don't use either of those then i'll probably go ahead with using Premiere pro's audio effect tools to process the audio depending upon how much work it needs.

I've been looking at different intro's and outro's and i've found an after effects template on the internet that i'm going to use.
Its by a Youtuber called Mocrag
Here is the template:
Im not looking to use the whole template, most likely certain elements from it like the main title on the template "The movie" and also some of the earlier elements on the video at the start.

So after we'd finished filming scene one, i had the actors re-act out certain parts of the script and took still images using my canon 60d. I also took some extra pictures around the scene location.
I done this so that i could create film artwork if need be such as a film cover, dvd cover, poster cd cover ect.. And also to use one of the images for my outro.
Here are the raw pictures that i taken


Feedback
The pictures went well, however, it was kind of an improvised decision for me to take them, as in i'd pre planned it (thought about it) but didn't properly plan it out as in take more time to plan it properly. I should've brought more lenses with me on the day, because i could have gone for a more distorted perspective had i used my other zoom lens instead of my 17-85mm, or a shot with a more shallow depth of field had i used my 50mm f1.8 prime lens.
Also if you look back over the pictures there's none with Duct Tape!! Which as i said in my previous blog post, if i'd of been thinking more rationally and clearer, i could of took pictures when Phillip was duct taped to the lamppost during one of the takes rather than waiting until the end of the filming to then take stills.

On the morning of the shoot, i contact the police non emergency 101 number to let them know that a violent scene was going to take place next to the spar shop. I had to give them my full name, address and contact telephone number, and they proved me with a reference code and assured me that the police would be aware of what's taking place, and that when i've finished filming to contact them back giving that reference code to let them know that i'm done.
Heres a brief video of some of the stuff that happened throughout the day of filming
Feedback/ overall thoughts
So yea i feel as tho i've learnt a lot off of this filming experience and encountered a few problems that i now know how to avoid when preparing for and filming a project in the future. On the day i took quite a few takes to finally get the vision that i was looking for because of either set location issues i.e. weather, screenplay issues i.e pacing or acting.
Screenplay feedback
With the script we had all decided to use it as a template to work off of, as in we'd follow the story of the script but improvise on the dialogue and some of the action to stretch out the scene.
On the day of filming we done 6 takes where we had a problem with the pacing of the script. The acting by the actors was decent, however, the 1st scene was moving to fast so we had to improvise to make up for the second scenes continuation of the first scenes footage in Phillips bedroom. What kept on happening was, by the time screenplay had gotten to the INT.PHILLIPS BEDROOM. NIGHT. LATER the 1st scenes mobile phone footage had finished because the pacing was too fast. Had i of decided to be content with that, i would've had to of have Phillip and the audience re-watch back something that has already happened(replay the footage), which would of left me in trouble as i wanted a continuation of the first scene over onto the second scene via voice over and a clip of it showing on Phillips laptop.
Technical feedback
After listening back to the audio from my third take, i decided to not use the felt strip because when i listened back to the footage, the audio was too muffled because of the mic hole was too covered by the felt strip and also the layers of clothing on the actors from the mic moving around where it was fitted.
If i was to reuse this method i would use paper clips or a pin so that i could firmly attach it to the actors clothing and maybe remove some of the layers off of the felt strip or use moleskin padding.
I shot some scenes without the Rode mic because whilst filming besides seeing my shadow on the pavement i also could see the video shot gun mic's shadow too.
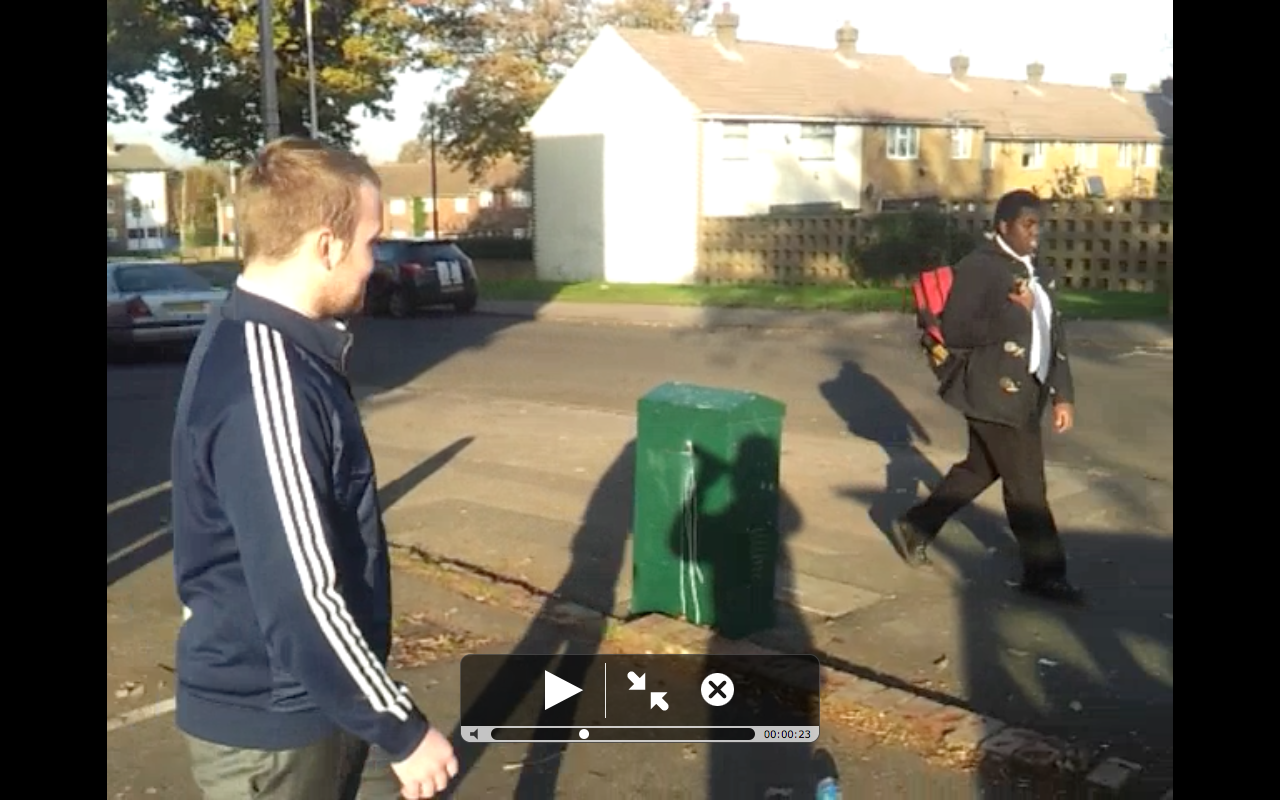 |
| Mic shadow on the green box |
 | |
|
Also because of the weather on the day, it was very bright at the location, so besides getting some good lens flares i also got some over exposed shots which could blind the audience.
 |
| Bright sun flare, where i'm using a phone i couldn't use a ND Grad filter |
 |
| Bright sun flare, where im using a phone i couldn't use a ND Grad filter |
Some other minor mistakes that i made was forgetting to close my car boot whilst filming some of the first takes so the shadow was showing on the ground (not that people would notice)
 |
| Phillip (on the right) is standing on my car boot shadow |
Set Props feedback
More duct tape, i didn't have enough and ran out towards my final retakes, so had to use brown box tape and selloptape instead.

General feedback
The rest of my feedback about myself i personally feel that i should of been more observative on the day. Whilst filming i was under a bit of pressure for time because i'd forgotten that i had a prearranged an event for that evening, so even tho my mind was on the current task, the fact that i was working to the clock made me overlook and miss out certain things i would of thought of.
For example, when i mentioned earlier about doing so many retakes because of the pacing of the action in correlation to the screenplay, if i'd of thought rationally, where the footage was ending in relation to the screenplay section, i could've continued filming and added onto the scene Takes that ended fast, because in the second scene it's a continuation of the first scene but for it to happen there has to be a switch scene, so i could've taken advantage of that and 'cheated' the audience. Had i'd of done that i could of saved myself more time and also MORE DUCT TAPE!!
But besides that, i had fun and learnt quite a lot from this whole experience so far.


